How to create product images for custom leather wallets on Etsy? A guide to engraving previews, font placement, and interior card slots.
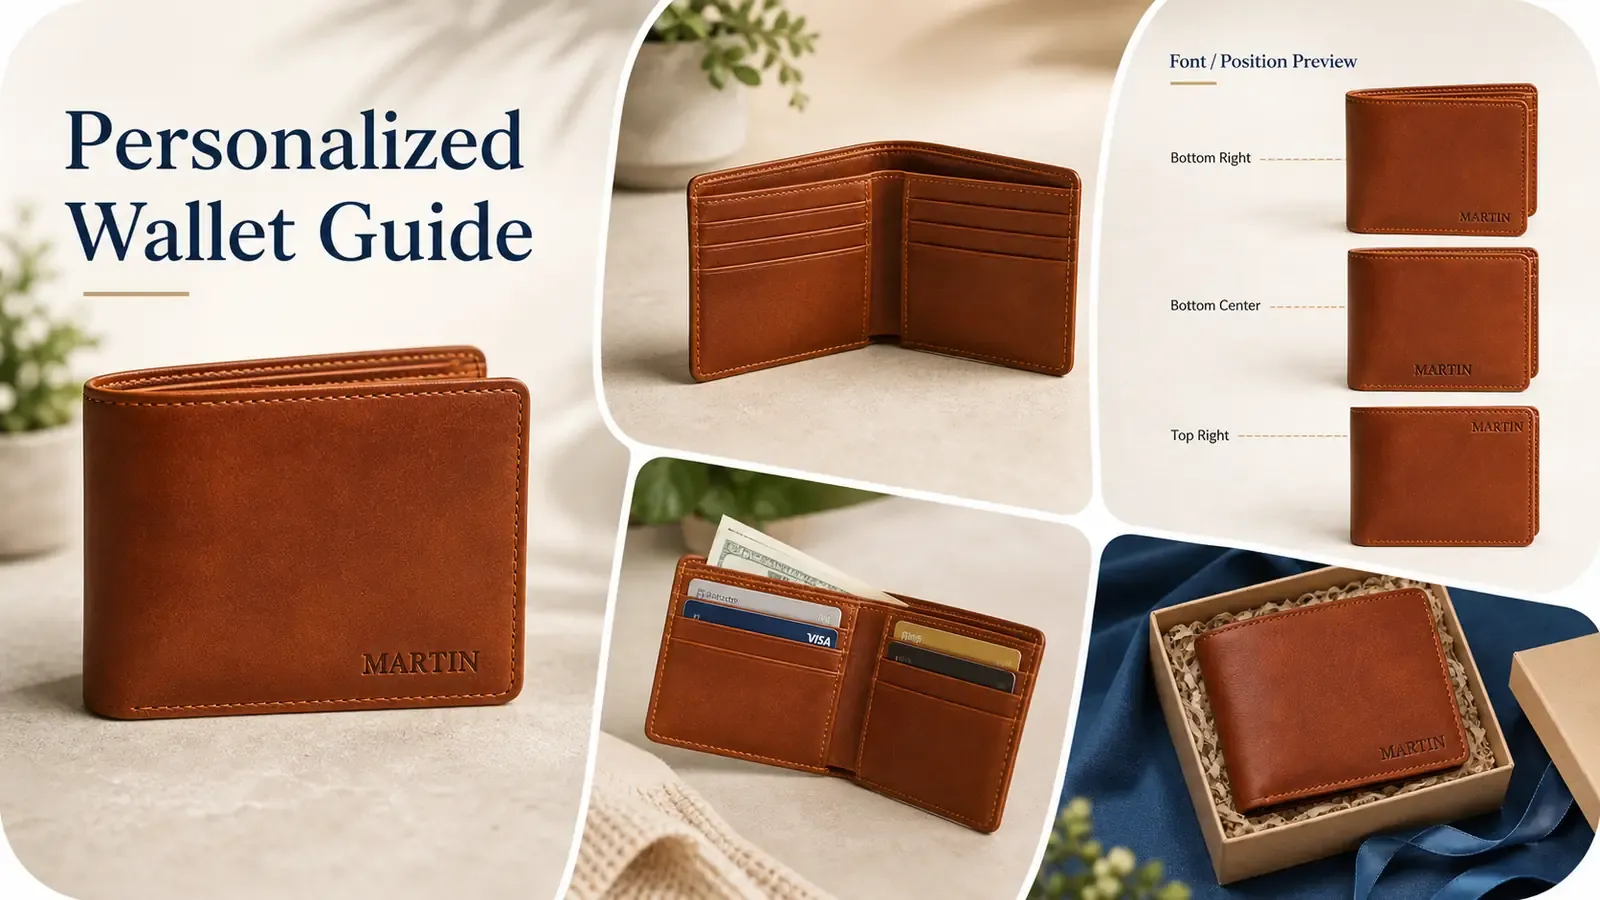
When making custom leather wallets on Etsy, many mistakes don’t stem from the engraving process itself, but rather from the preview images.
Even though the order note clearly states the engraving should read “J.R.”, with font choice 03 and placement in the lower-right corner, after generating the preview image, the punctuation disappears entirely, the text shifts to the center of the wallet, and an extra card slot mysteriously appears inside. No matter how well the actual engraving is executed, the final product still differs from what the buyer confirmed at checkout—resulting in returns and negative reviews one after another.
For custom listing images, the top priority isn’t creating a high-end aesthetic—it’s faithfully reflecting every personalized choice made by the buyer. Font style, engraving position, punctuation marks, and the layout of interior card slots: every detail must correspond precisely to the order fields listed.
Below is a practical guide explaining how to create product images for custom leather wallets on Etsy, breaking down key steps such as engraving previews, font selection, engraving positioning, and crafting and self-checking interior card slots—helping you avoid post-sale issues caused by poorly designed custom product photos.
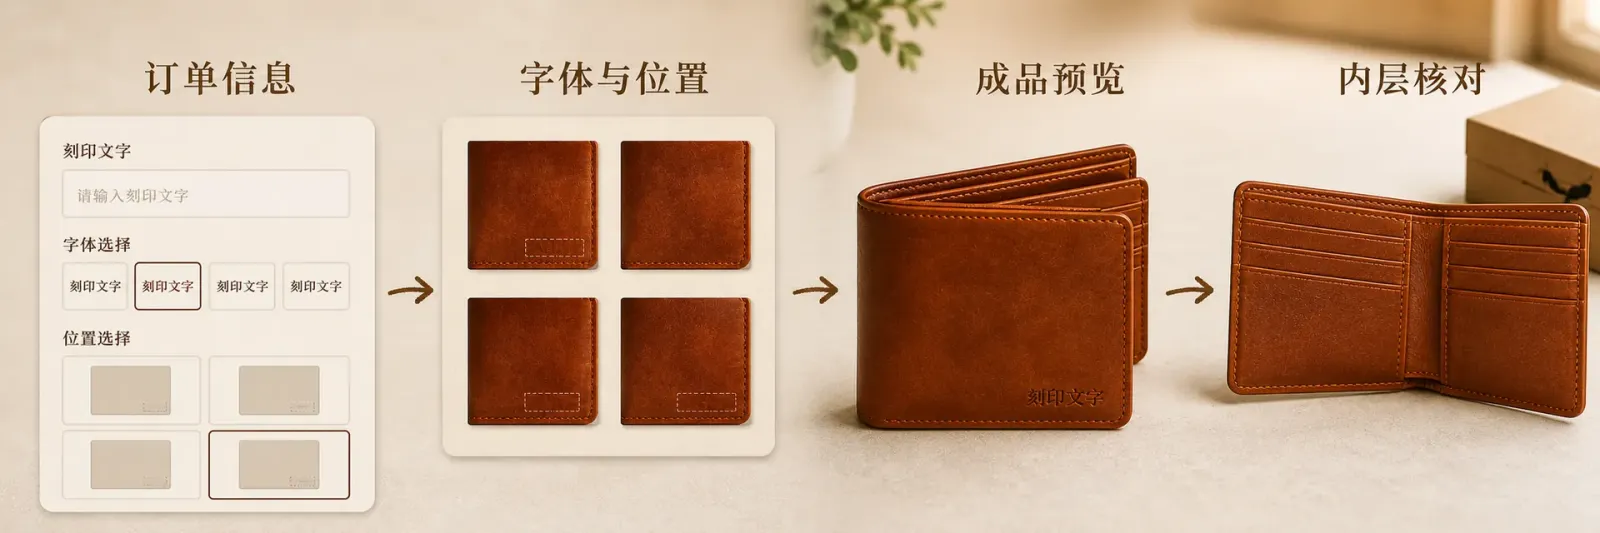
A preview isn’t just decorative; it should connect the buyer’s inputs, available options, and the current wallet structure into a single, cohesive order record.
I. Before moving an order into the preview stage, first distinguish between personalized inputs and product variants.
Etsy’s personalized fields are ideal for collecting text or information entered by buyers, while options like color and style that affect inventory, pricing, or SKUs are better suited to variant settings. For wallets, leather colors and overall wallet styles are typically fixed choices, whereas names, initials, or short phrases fall under personalized inputs. Specific field configurations should still align with your store’s actual sales approach.
If your shop offers multiple approved leather colors, you can use to generate color‑variant images of the same wallet model via product color changes . The target color must come directly from your actual stock samples; stitching, lining, hardware, and engraving should all be checked against their corresponding variants—never arbitrarily add colors not currently sold in your store.
Don’t let a single image simultaneously invent new fields. If your listing only offers three fonts, the image shouldn’t display a fourth; if there’s no “inner engraving” option on the page, the example image shouldn’t place text inside the wallet either. Before production, organize all order details into a clear preview sheet:
Order items | What the image should show | How to handle inconsistencies |
|---|---|---|
Wallet style and leather color | Appearance and internal structure of the corresponding variant | Switch back to the correct variant—don’t artificially alter colors to misrepresent |
Engraving content | Preserve letters, numbers, spaces, and punctuation | Stop generating images until the buyer or order rules confirm |
Font number | Use the same typeface shown in the option image | Don’t substitute with “similar fonts” |
Engraving position | Consistent with both the position diagram and the buyer’s chosen option | Return to a blank physical reference and redo the preview |
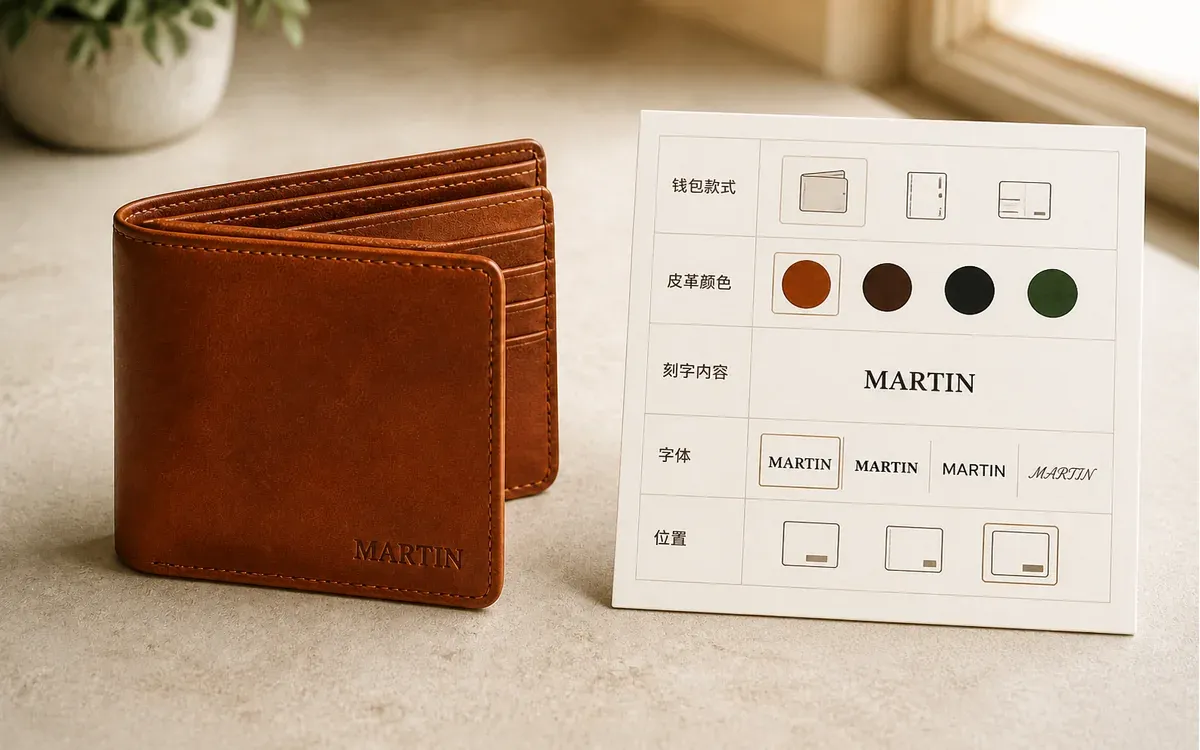
Every visible result should have a clear origin within the order fields—the image cannot independently add new options.
II. The main image for Etsy custom wallets must first showcase the finished, personalized product.
Etsy has clear requirements for the main image of personalized merchandise: the primary photo must show a real, fully customized finished product that closely resembles what the buyer will ultimately receive. Blank wallets or placeholder text like “Your Text Here” should not be used as the main image. Computer-generated mockups of personalized options can be included in subsequent images.
Therefore, start with an actual, completed wallet as the main image. The engraving should be visible but need not be enlarged to the point where the wallet loses its proportions; the leather surface, folded edges, stitching, and hardware must remain intact. Any example name or abbreviation should be clearly labeled in the listing description as a sample of the finished product, so buyers don’t mistakenly assume the page only sells that specific set of characters.
When existing materials are scattered, you can use product gallery images to supplement closed, opened, and detailed views of the same wallet model . At a minimum, prepare images showing the closed finished product, the inner layer when open, a real engraved example, and reference points for placement; however, the main image should still feature a genuine personalized finished product that meets Etsy’s requirements. Add generated images later, carefully checking each item—leather color, engraving, stitching, card slots, and interior compartments.
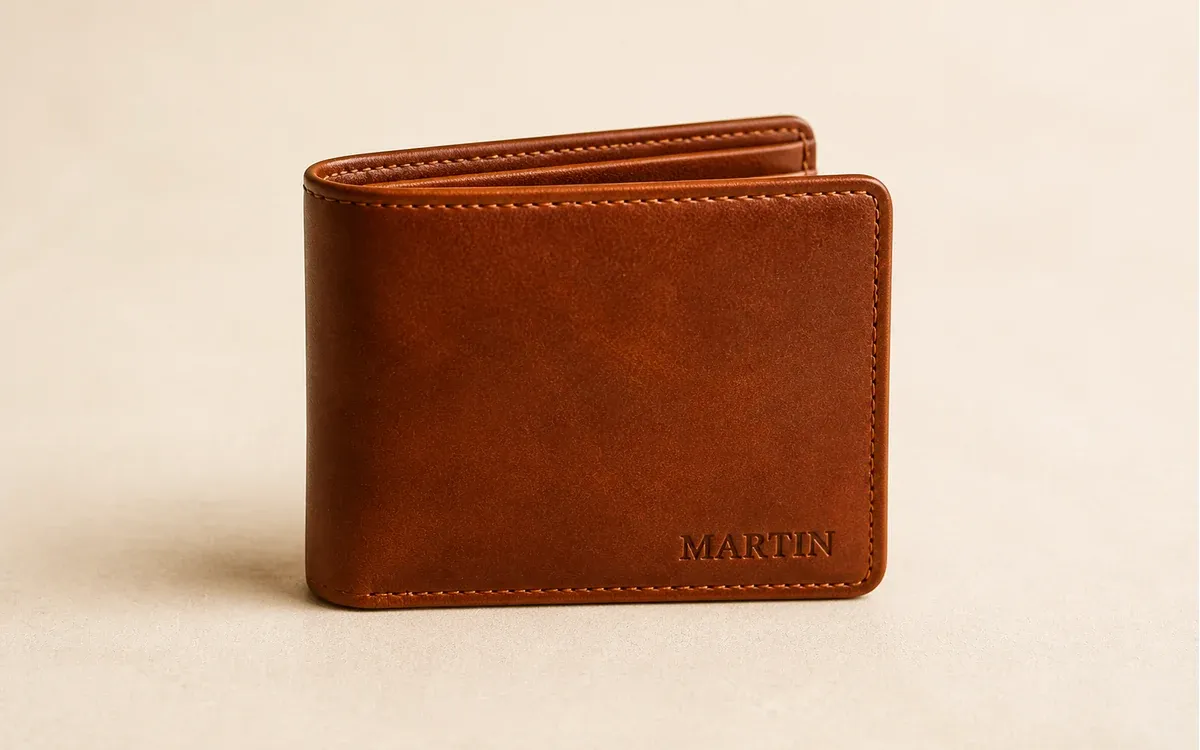
The main image should first demonstrate the actual deliverable final result, while leaving blank wallets and placeholder text out of the initial shot.
III. Font, Placement, and Character Length Previews: Addressing Three Key Decisions Separately
The font preview answers “What does the letter look like?”, the placement preview answers “Where is it engraved?”, and the character length preview answers “How will this text fit?” If all three are mixed into one image, buyers often confuse font examples, position numbers, and finished-product previews as a single option.
1. Keep the same characters in the font preview to compare typefaces.
Use the same short set of characters to showcase all available fonts, keeping size and line spacing consistent. If a font supports only certain symbols or case variations, clearly state this next to the option—don’t wait until the image fails to explain.
2. Use blank outlines for placement previews, avoiding any pretense of being the final product.
Positions such as lower-left, lower-right, center, or inside should be marked with numbered labels, matching exactly the names listed in the product details. The placement preview serves as a guide, but the final result should still be judged against the actual finished product or order preview.
3. Provide boundaries for character-length previews, rather than automatically squeezing the font.
Short abbreviations, names, and longer phrases occupy different widths. When exceeding the store’s approved limit, follow pre-defined rules—for example, requiring shortening, breaking lines, or canceling that position—rather than forcing overly narrow text into the leather surface.
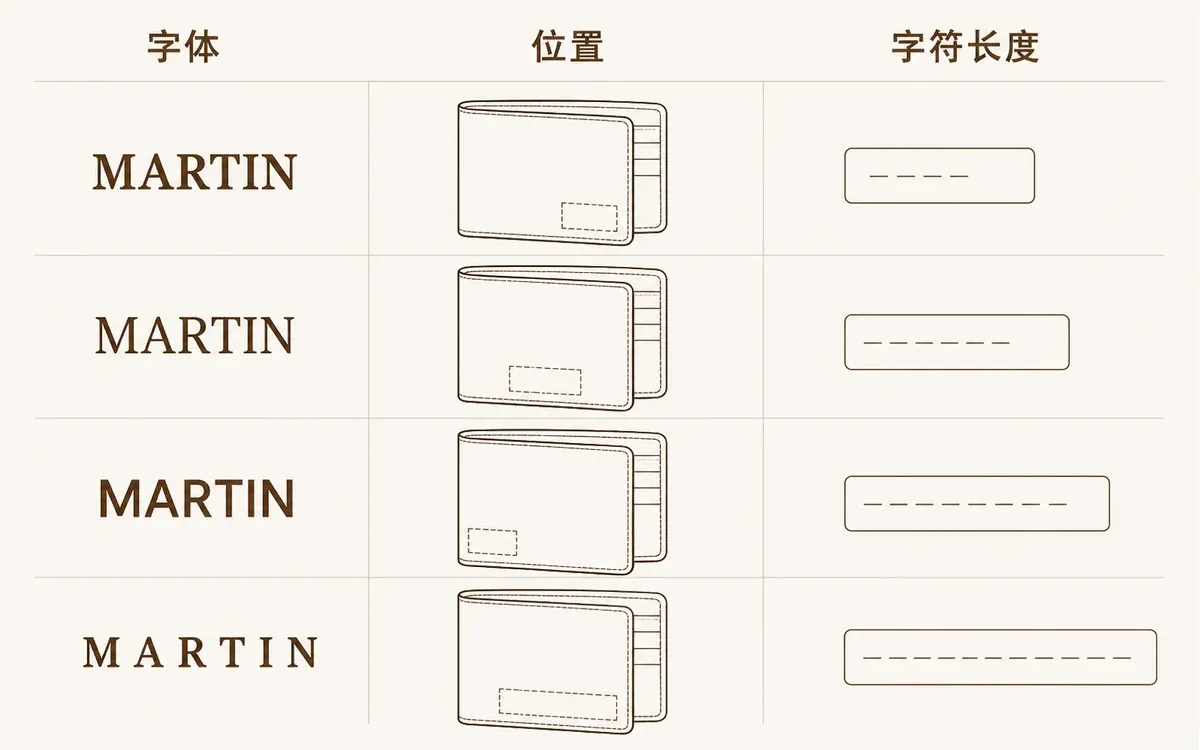
Each of font, placement, and length addresses a distinct question; only after confirming all three should you proceed to the order’s finished-product preview.
IV. Order-preview images must display selection outcomes while also revealing situations where production isn’t feasible.
After incorporating the buyer’s input into the preview, first read through each character aloud. Periods, hyphens, spaces, diacritical marks, and capitalization all count as part of the order content—do not omit them simply because the layout doesn’t look appealing. Next, verify the font number and placement, then check whether the text overlaps with stitching, folded edges, snap buttons, or leather seams.
If the preview reveals overlapping lines, excessive length, or unsupported characters, do not secretly shrink the text until it’s nearly invisible. Stop at the confirmation stage, ask the buyer to revise according to the rules outlined in the listing, or choose an alternative engraving location that fits. This is precisely the value of the preview: exposing potential production conflicts ahead of time.
When confirmed text needs to be placed in a new angle view, you may locally redraw the engraved area while keeping the wallet’s structure unchanged. For each angle, recheck the characters, typeface, placement, and depth of embossing; internal layers, stitching, and hardware should remain untouched during redrawing.
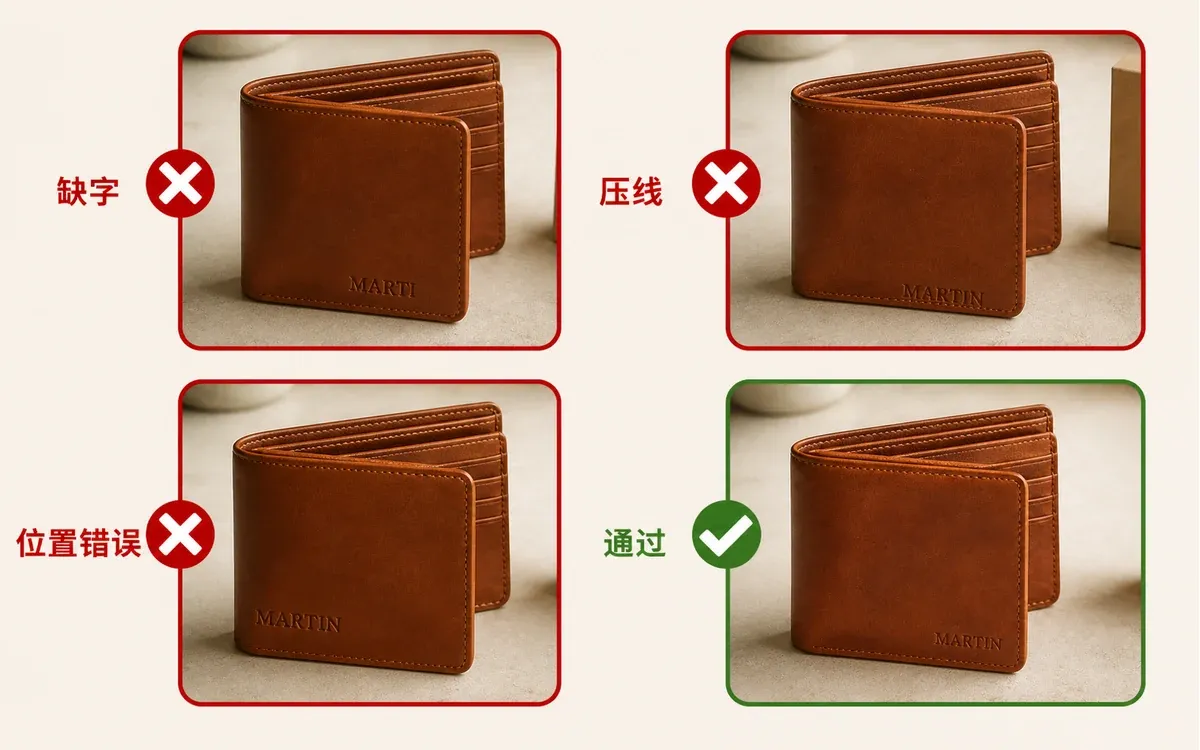
The purpose of the preview is not to ensure every order passes, but to promptly identify cases where production cannot proceed under the current options.
V. Once the wallet is opened, the internal card slots must match the original design shown in the main image.
Closed-view images rarely reveal design errors, but opening the wallet makes them impossible to hide. The number of card slots, direction of openings, ID window, bill compartment, coin pocket, lining, and snap buttons must all align with the physical product currently on sale. Do not borrow an internal-layer image from a similar wallet, nor duplicate a single slot into two just to make it seem more spacious.
It’s recommended to first photograph an empty wallet, then place a few cards inside as a visual aid. Cards should only illustrate entry points and layering—not prove maximum capacity—and are not considered part of the accompanying items. If the interior also features engraving, separately show its distance from card slots, stitching, and fold lines.
When the leather surface shows only dust, faint reflections, or background specks, you can circle the leather and background for localized refinements . After repainting embossing, stitching, card-slot openings, or leather textures, return to the original product reference.
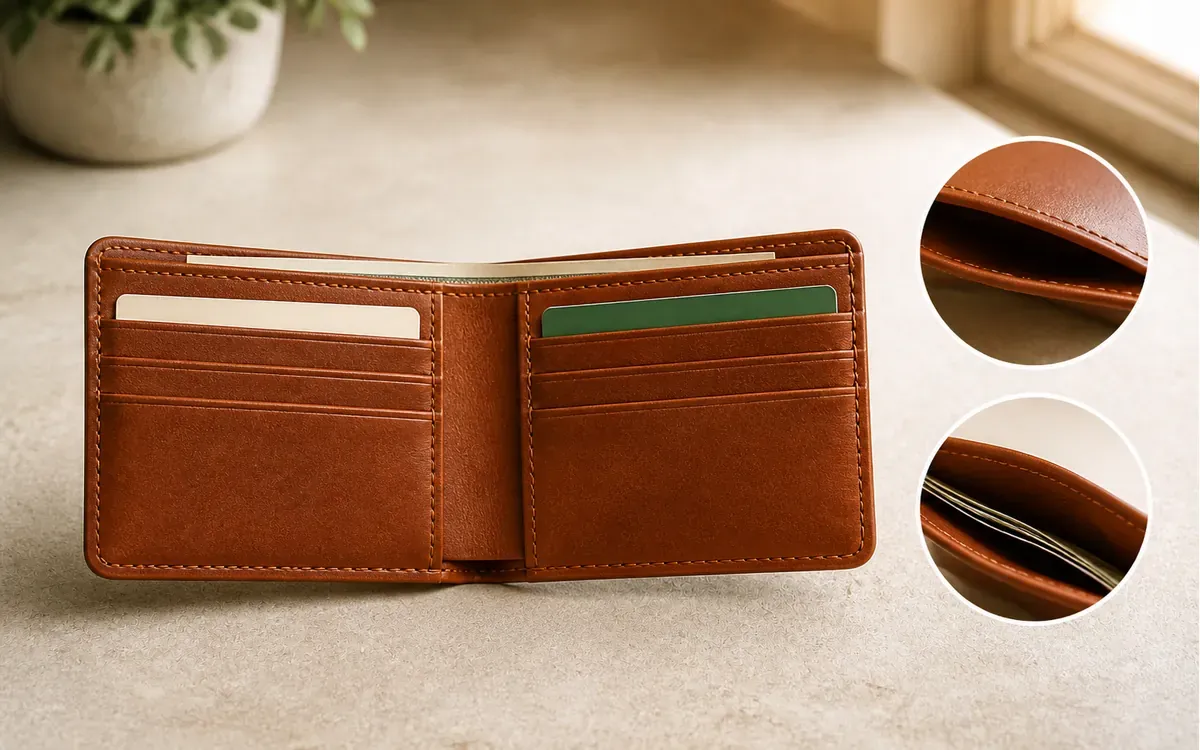
Internal-layer images should first confirm the design before explaining how cards are arranged; filling the entire frame should never replace structural verification.
VI. Common Issues with Etsy Custom Leather Wallet Product Images
1. What if the buyer hasn’t selected a font—can the default font from the main image be used?
This is only permissible when the listing explicitly specifies a default font. Otherwise, customers should be prompted to select their preferred font in the order notes, or you should contact the buyer for confirmation before production; do not automatically assume that the sample font shown in the main image constitutes authorized text for the order.
2. Can the text on the gift box greeting card share the same input field as the wallet engraving?
It’s not recommended. Since each input corresponds to different items, locations, and character limits, placing them in the same field may easily lead to omissions or errors. Please name the fields separately and clearly indicate in the images which text goes on the wallet and which goes on the greeting card.
3. Can the card slot diagram include an actual bank card or ID card?
Do not use real personal documents or payment cards. Instead, use prop cards without names, card numbers, or barcodes, showing only the insertion direction and exposed height. Also, avoid replicating real‑world institutional logos in the illustration, so that the prop’s information does not overshadow the wallet’s structural details.

AI Image Tool Built for E-commerce Teams
For new product launches, advertising, and promotional campaigns, use AI to generate product images, scene visuals, ad creatives, and short video assets — making content production faster.