How to create product images for home lighting on Google Shopping? A guide to capturing evidence of switch operation, color temperature, material, and spatial scale.
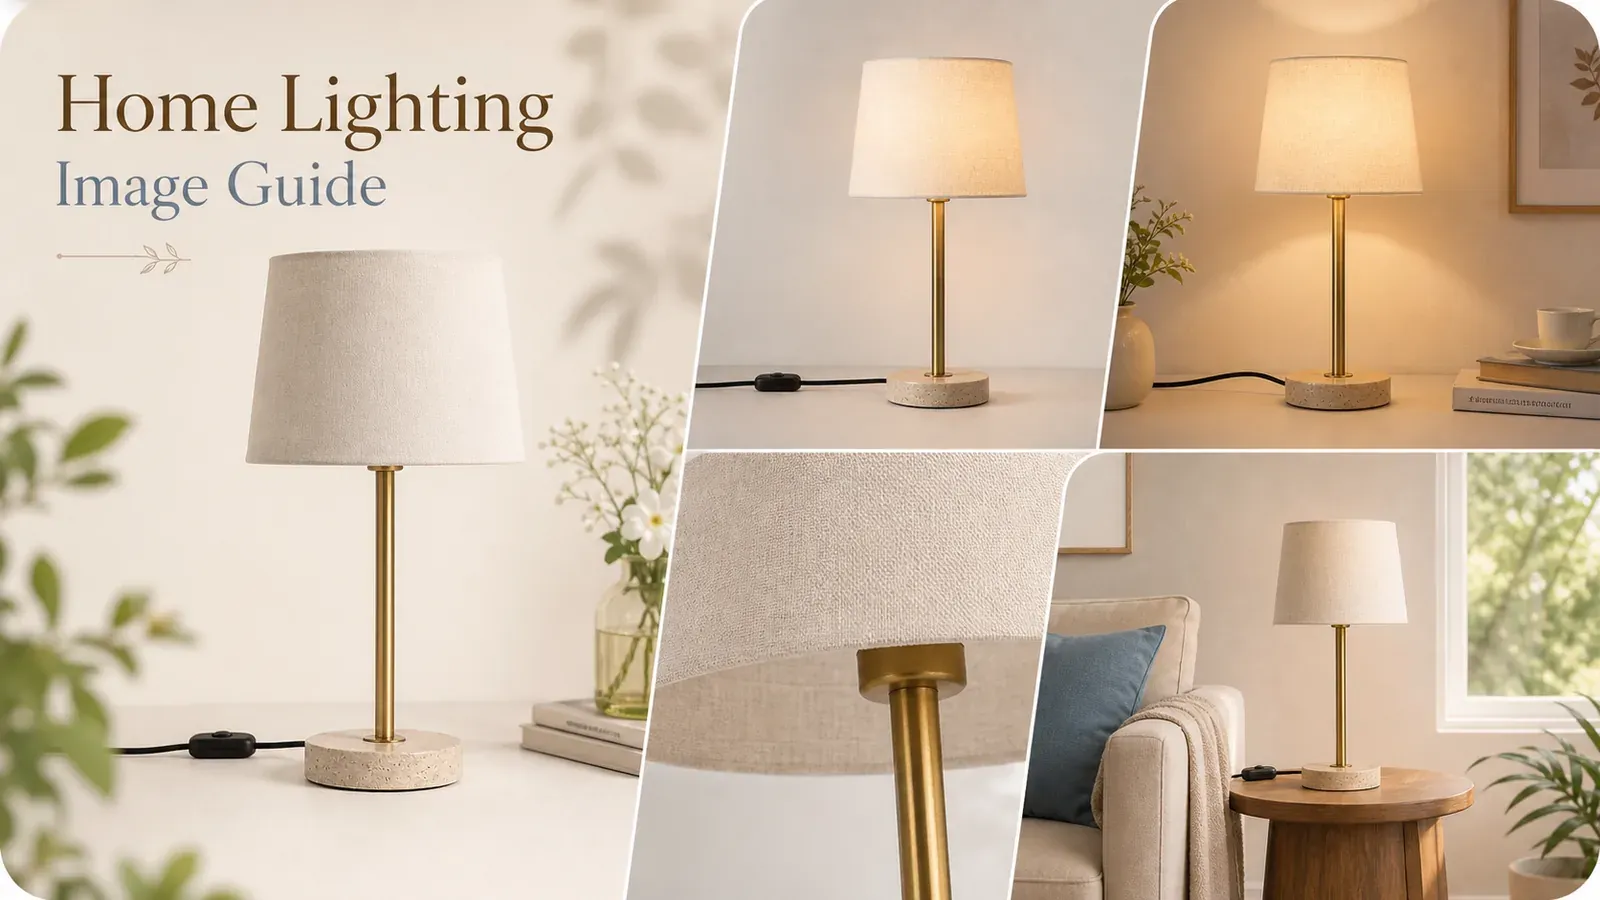
When running Google Shopping ads for home lighting products, the most subtle reason for disapproval is often not blurry image quality, but rather mismatched on-off images .
Many lighting product images artificially boost brightness, adjust color temperature, and blur details to create a certain ambiance—resulting in situations like: a brass lamp post when off, turning completely black when on; inconsistent outlines of the lampshade front to back; chaotic light spots spreading across walls; or power cords seemingly disappearing into thin air. While the atmosphere may appear sophisticated, such discrepancies already constitute “product-image mismatch” under Google’s compliance review and buyer perception.
Lamp images cannot rely solely on aesthetics; they must be backed bya chain of evidence.The explanation is as follows: the off‑state image defines the product’s structure, the on‑state image showcases its lighting performance, close‑up shots verify the materials, and scene images help convey scale. Color temperature, material, dimensions, and lamp body structure are each independently documented, with no mutual tampering and no reliance on viewers’ imagination to infer parameters from the visuals.
This article compiles a practical, ready-to-implement guide for reviewing Google Shopping images of home lighting products, helping you standardize on-off effects, color temperature presentation, material details, and spatial scale—preventing rejections due to non-compliance and reducing return rates caused by customer dissatisfaction.
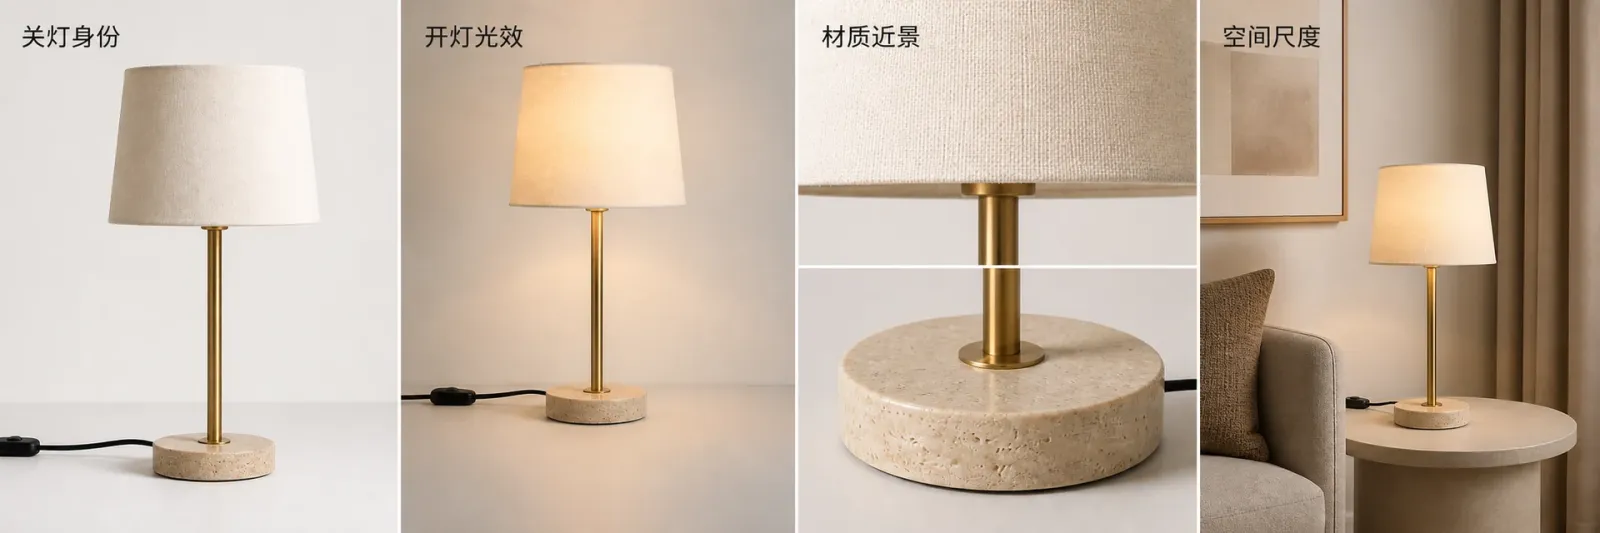
Each component—lamp body, lighting effect, surface finish, and dimensions—requires its own set of supporting images; only when combined do they form a verifiable lighting product image library.
I. The off‑state image first establishes the product identity of home lighting fixtures
The off‑state image is best suited for verifying the lampshade outline, number of lights, base, switch, power cord, lamp holder, and accompanying accessories. First confirm whether the current SKU is a table lamp, floor lamp, wall lamp, or pendant light, then cross‑check each item against the packing list. If bulbs are not included with the product, avoid listing them in the packaging description just because the scene calls for it.
In the main image, it’s also important to distinguish between the actual product and props. According to Google Merchant Center, image_link is used to submit the primary image; Google recommends that the main image clearly showcases the product being sold, avoiding any unrelated items. For operational purposes, start with a neutral background photo showing the complete fixture with minimal obstructions, reserving furniture, books, and greenery for supplementary images.
If the supplier only provides one frontal off‑state image, you can first use to supplement it with white‑background angles, structural details, and a set of on‑state scene images . Input reference data for the same lampshade, arm, base, wiring, and switch, generate the images, and compare them one by one—never add extra lamp holders or remove power cords simply to balance the composition.
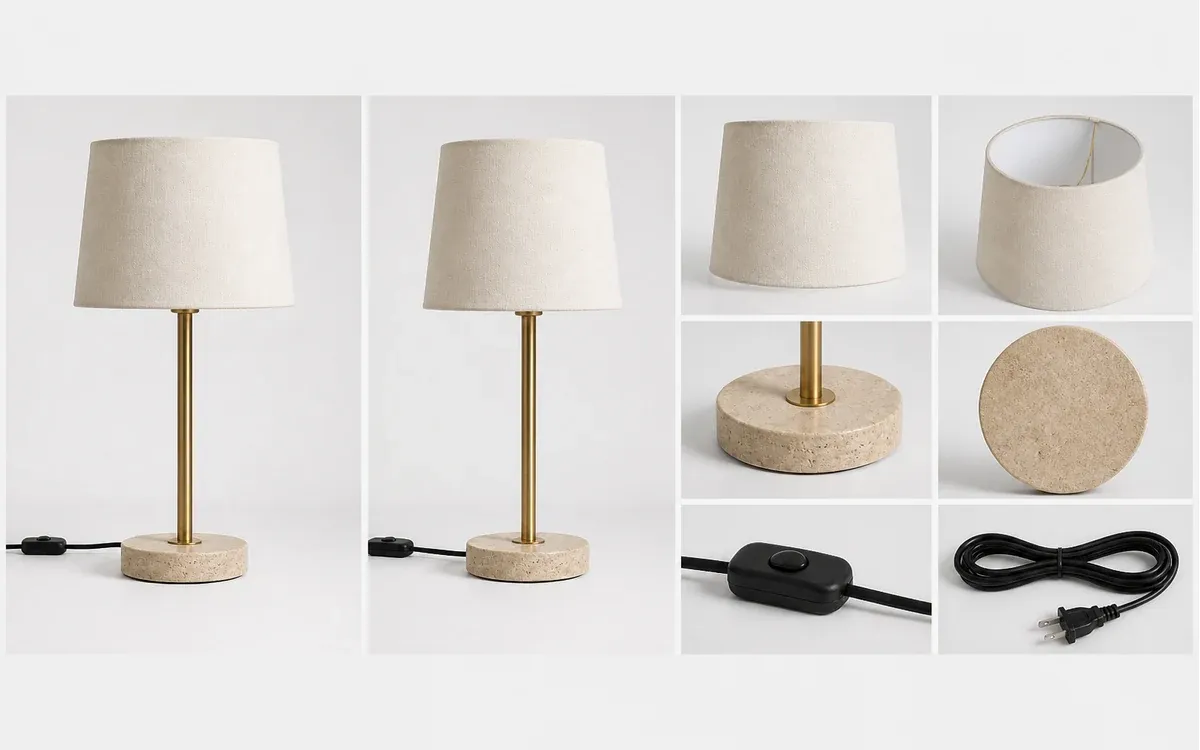
The off‑state image primarily answers “what will the buyer receive,” without serving as proof of color temperature or lighting performance.
II. On‑off images must be shot as pairs to provide a reliable benchmark for lighting effects
An on‑state image is not merely a brightened version of the off‑state image. Both images should ideally maintain the same camera position, composition, lamp color, and surrounding objects, with changes limited to whether the light is on or off. This allows you to observe the lampshade’s translucency, light direction, wall‑mounted light patterns, and reflections from the lamp body—rather than speculating about changes in two entirely different settings.
First capture the off‑state baseline, then shoot the on‑state image. If automatic exposure causes the on‑state image to appear too dark, adjust the shooting settings instead of turning the lampshade into a featureless white patch. Even after turning the light on, ensure the edges of the lampshade, base, and connecting structures remain visible; if the number of lamp arms, lamp heads, or cable routing changes, it indicates a different product altogether.
A practical pair of images might include: a full view of the off‑state, a full view of the on‑state, a close‑up of the lampshade after switching on, and wall‑mounted light patterns. These images demonstrate what is visually observable, but they do not serve as proof of illuminance, coverage area, or energy‑saving performance.
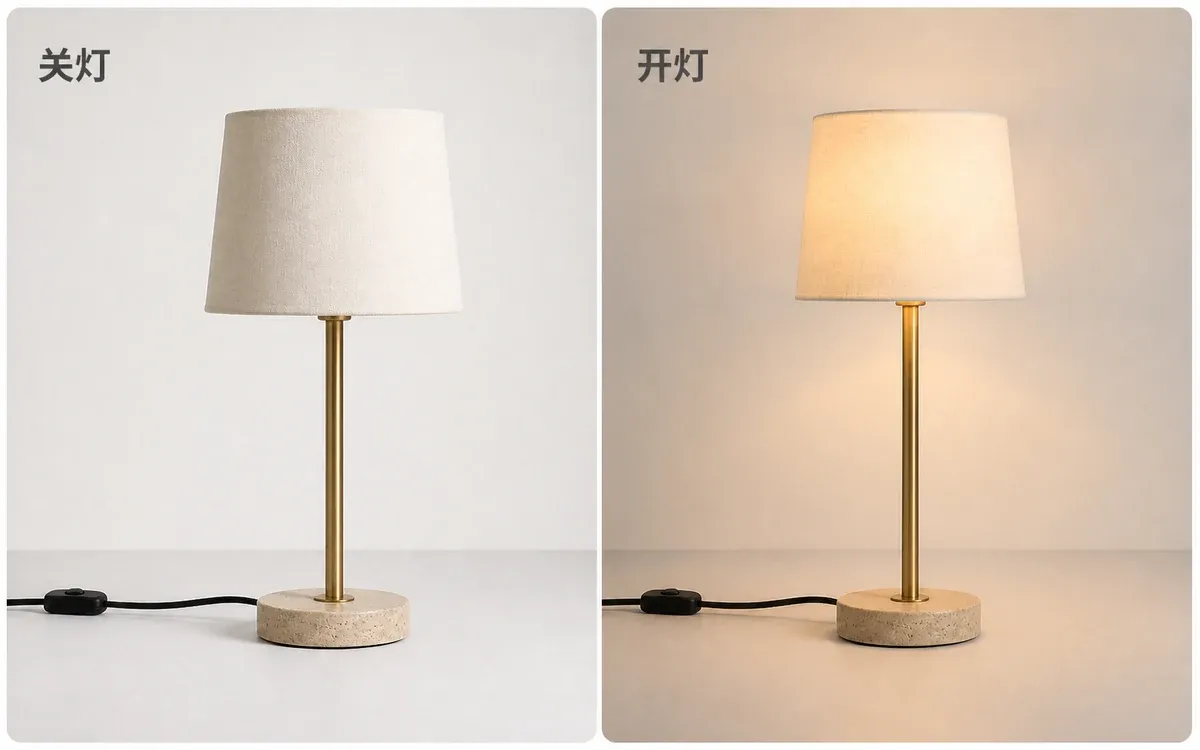
Only when the camera position and product remain consistent can buyers truly perceive the visual differences before and after the light is turned on.
III. Light color and lamp material must be verified separately; never infer parameters directly from the image
content to be assessed | priority evidence | what the image can actually show |
|---|---|---|
light color range | brand‑approved color ranges compared under uniform conditions | warm, neutral, or cool tendencies visible in the image |
metallic, glass, fabric, or wooden surfaces | overall off‑state image paired with corresponding close‑up views | Visible attributes such as texture, transparency, sheen, and seams |
Color temperature values, material composition, or coating processes | Current model’s approved specifications | Cannot be inferred from the image |
A yellowish tint in an image does not necessarily indicate a specific color temperature, nor can a bluish cast be directly translated into numerical values. Camera white balance, wall colors, natural light coming through windows, and post‑production color grading can all alter perceived hues. If a product offers multiple color temperatures, the labels and corresponding color temperature values shown in images must match the brand’s approved documentation; when no data is available, only describe whether the image conveys a warm, neutral, or cool tone.
When creating multi‑temperature comparison images, keep lighting fixtures, walls, camera positions, and exposure settings consistent, switching only one approved setting at a time. Clearly label each image with its respective setting—avoid vague claims like “eye‑friendly” or “true color reproduction” that cannot be verified by the images themselves. Even if a lamp provides only a single color temperature, do not artificially generate three distinct effects just to fill out the gallery.
To correct slight color shifts between adjacent images, you may select areas on the lamp body and a neutral background for localized color verification . The illuminated portion of the lampshade should retain visible layering; applying the same orange filter to all lit images will simultaneously alter both the lamp’s material and the surrounding space’s color, rendering comparisons meaningless.
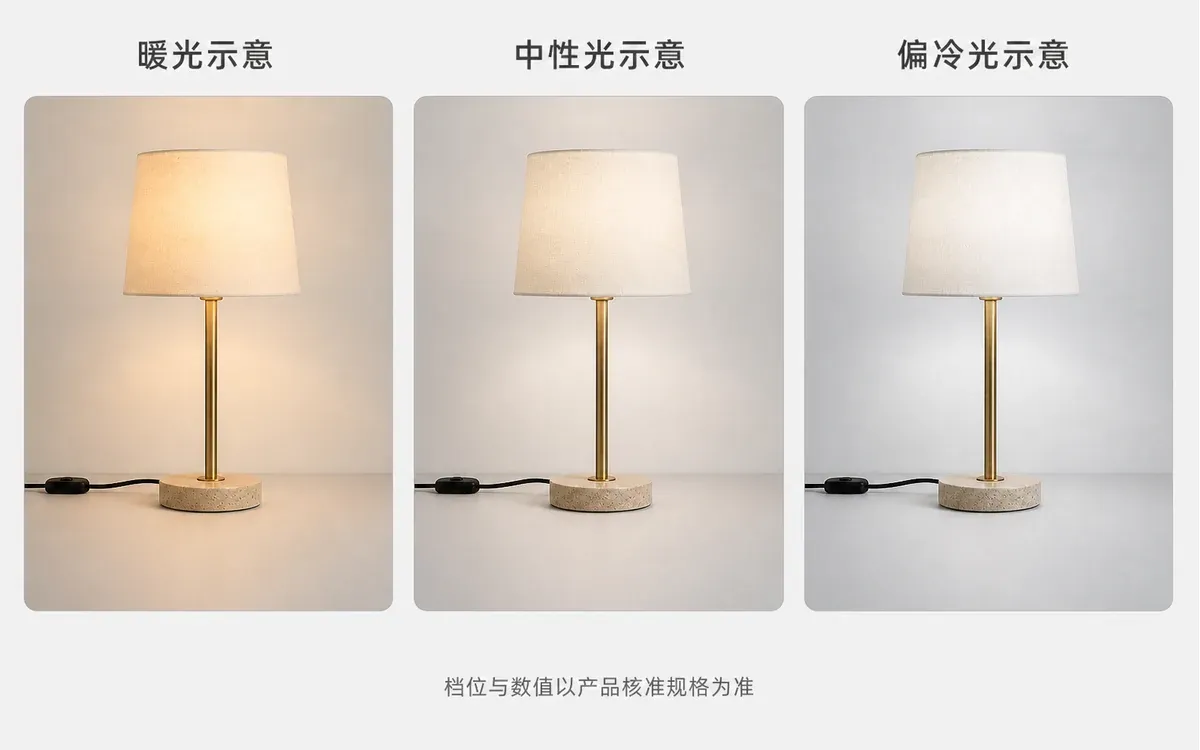
This illustration merely demonstrates the comparison method; the actual image library displays only the approved settings for the current model, with names and values sourced directly from the brand’s documentation.
1. Obtain evidence of the lamp body’s material in close‑up shots taken with the lights off—do not infer conclusions based solely on highlights.
Metal, glass, wood, or fabric lampshades each require separate close‑up shots capturing identifiable surface details. For metal, examine brushed patterns, edges, and seams; for glass, assess transparency, frosted finishes, or textured surfaces; for fabric, observe weave, borders, and stitching; and for wood, evaluate grain and jointed sections. Material names, coating processes, and compositions should still be referenced against the brand’s official documentation, with images providing only visual clues.
It is best to photograph material samples with the lights off, preventing strong illumination from washing brass tones to silver or turning frosted glass completely white. Include one overall shot to help viewers locate the specific area being examined; presenting only an abstract texture may leave buyers unable to determine whether it belongs to the lampshade, base, or decorative element.
Dust, fingerprints, and stray light can be retouched, but edge thickness, seam locations, and grain directions must not be arbitrarily altered. If a localized area is modified to resemble another surface, revert to the original reference and start over, rather than continuing to rely on captions for explanation.
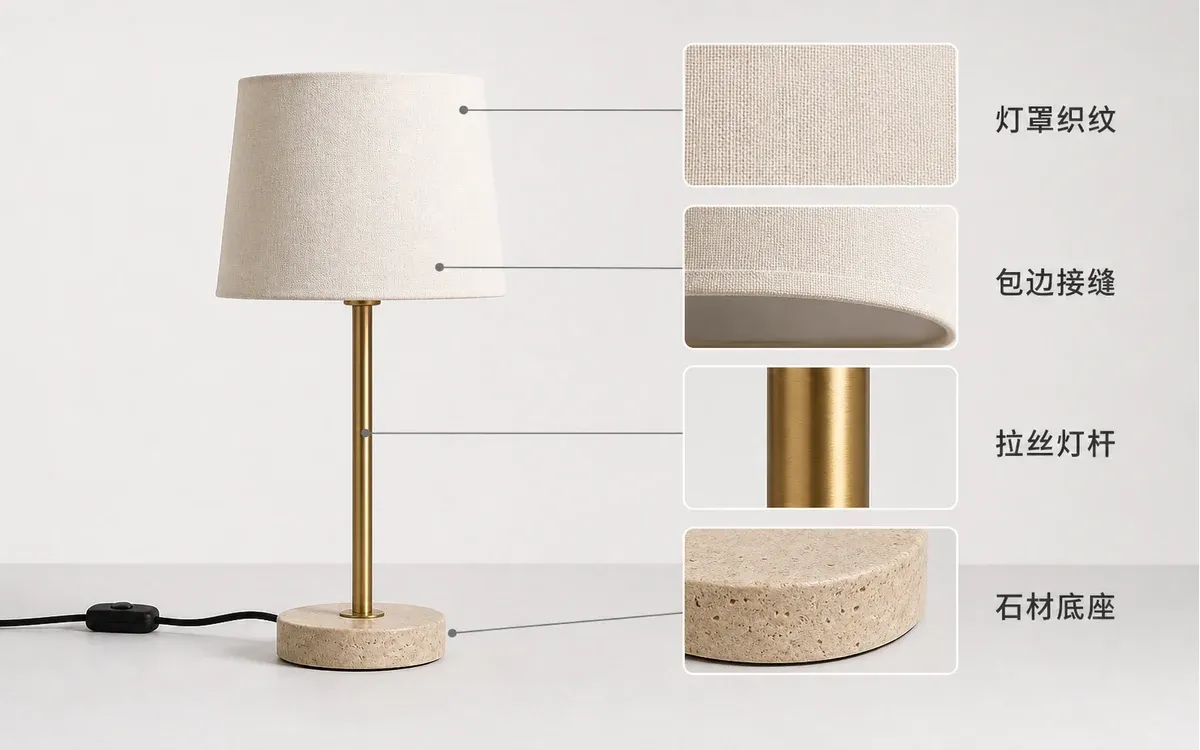
Each close‑up material image must correspond clearly to its designated position on the complete lamp.
IV. Spatial Scale: First review dimension diagrams, then use scene images to understand placement.
Images | Responsible for answering | Cannot replace |
|---|---|---|
Dimension diagram | Lamp height, shade width, base footprint, cord length, or installation dimensions; numbers must strictly adhere to the current SKU’s approved specifications | Visual placement within a real room |
Scene image | The relative proportions of table lamps to desks, floor lamps to sofas, and pendant lights to dining tables | Specification sheets and exact measurements in centimeters |
When supplementing spatial scale illustrations, fix the same lamp and create scaled representations for different rooms. Input the approved external dimensions and their relationships, then verify the proportions of the lampshade, base, and furniture after generating the image; versions that appear larger or smaller within the same scene should not be mixed into a single SKU’s image library.
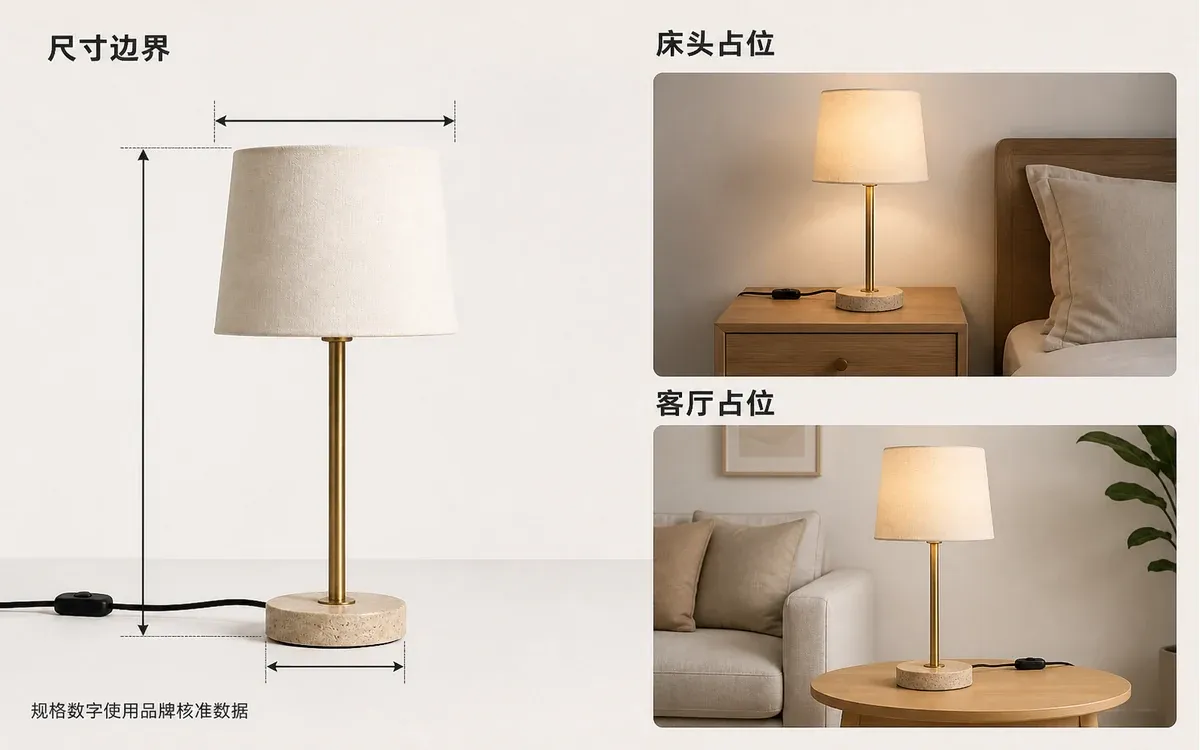
On the left side, explain the measurement locations for lamp dimensions, with specific values based on the brand’s approved documentation; on the right, provide scene illustrations to help visualize placement relationships, which do not substitute for dimensional data.
V. How to Assign Google Shopping Lighting Product Images to Main and Supplementary Photos
Submit a complete product photo showing the fixture in the off state to image_link; other angles can be placed in additional_image_link. According to official Google guidelines, supplementary images may showcase different angles, close-up details, or usage scenarios. For lighting products, you can organize images in the following sequence: “full view with lights on—color comparison—material close-up—dimensional diagram—spatial scene—contents included with the order.”
Each color, lampshade, or lamp head combination should have its own corresponding variant image. Before submission, double-check that the image URLs are accessible, file extensions and formats match, and ensure the main image does not contain promotional text, watermarks, or items not included with the order. The platform’s fields only receive the images; whether the on/off states, color temperatures, materials, and dimensions align correctly still requires manual verification prior to delivery.
Delivery Fields | Recommended Image Sequence | Pre-Delivery Checklist |
|---|---|---|
| Complete Off-State Photo for the Current SKU | Product Identity, Variants, URLs, Formats, No Promotional Elements |
| Full On-State View → Approved Color Rendering → Material Close-Up → Dimensional Diagram → Spatial Scene → Contents Included with Order | Each image clearly shows the content, with the fixture structure matching the current SKU |
VI. Common Issues with Google Shopping Home Lighting Product Images
1. For multi-head chandeliers, must each individual light head be illuminated in the on-state photo?
Display according to the normal operating conditions of the current model and the brand-approved control method. If all heads are supposed to light up simultaneously, omitting even one will mislead buyers into thinking there is a malfunction. If the heads support grouped control, clearly indicate the current mode and provide an additional full off-state structural diagram to verify the number of heads.
2. When photographing a mirrored fixture, reflections of the photographer and equipment appear—should they all be removed?
You may remove distracting equipment outlines and human shadows, but retain controlled highlights so buyers can still distinguish between mirror-like and matte finishes. If, after retouching, edges, seams, or the number of lamps are inadvertently erased, the image should be returned for rework.
3. Should the app‑controlled interface of smart lighting fixtures be included in the product image gallery?
Only include such images if the current model genuinely supports this feature and the interface originates from a brand‑approved version. The interface image should serve as supplementary documentation, accompanied by a corresponding photo of the fixture in operation; do not substitute conceptual interfaces for actual hardware, nor display controls unavailable in the current region or version.

AI Image Tool Built for E-commerce Teams
For new product launches, advertising, and promotional campaigns, use AI to generate product images, scene visuals, ad creatives, and short video assets — making content production faster.