How to create product images for men’s suits on Shopify? A guide to selecting styles, fits, closures, fabrics, and sizes.
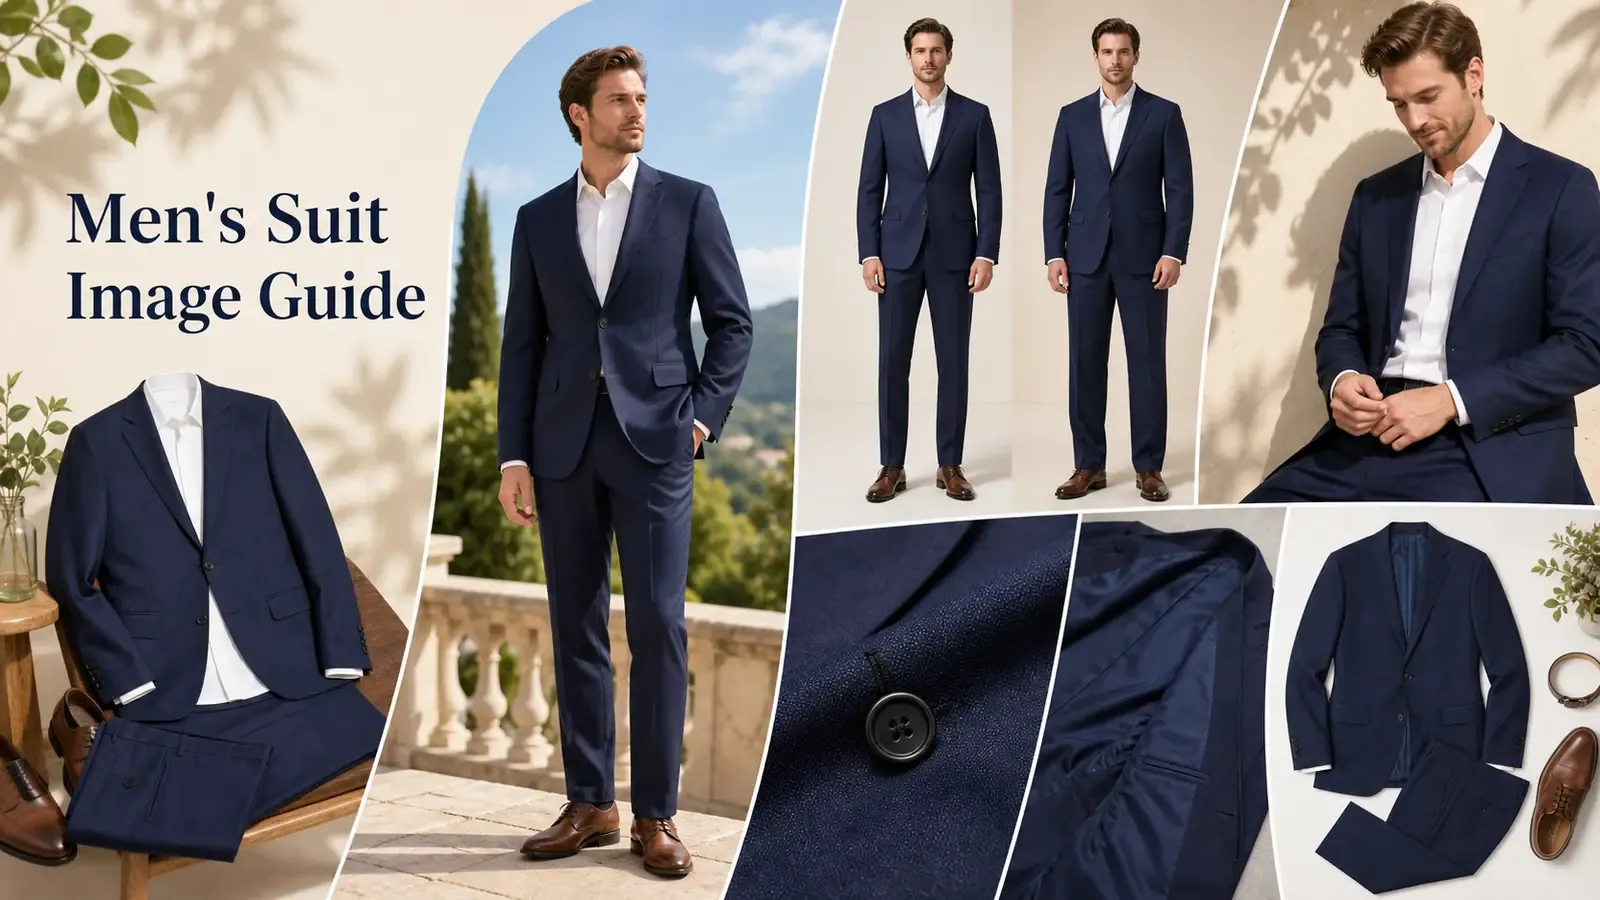
When building a standalone Shopify store for men’s suits, many shops run into the same problem: perfect ambiance, but ineffective product selection .
The models look sophisticated, and the settings are clean and appealing, yet after viewing, buyers still can’t tell the difference between fit styles: Is it slim-fit or regular? What does the waistline look like when buttoned up? Is the fabric textured or a matte solid color? Real-life photos of different colors and fits are mixed together, with inconsistent open vs. buttoned-up poses, leaving buyers to place orders based purely on intuition—and resulting in persistently high return rates.
Suits are standard products that rely heavily on strong silhouettes, precise sizing, and intricate details— strong silhouette, strong size, strong detail . Mood images can only serve as inspiration; what truly drives conversions and reduces returns is accurate visual evidence showing fit comparisons, buttoned-up states, fabric textures, and size references.
This article lays out a complete, practical workflow for creating product images for men’s suits on Shopify—from identifying the style, comparing fits, showcasing buttoned-up looks, highlighting fabric details, to selecting appropriate sizes—teaching you how to build a professional image library that helps buyers choose precisely and lowers return rates.
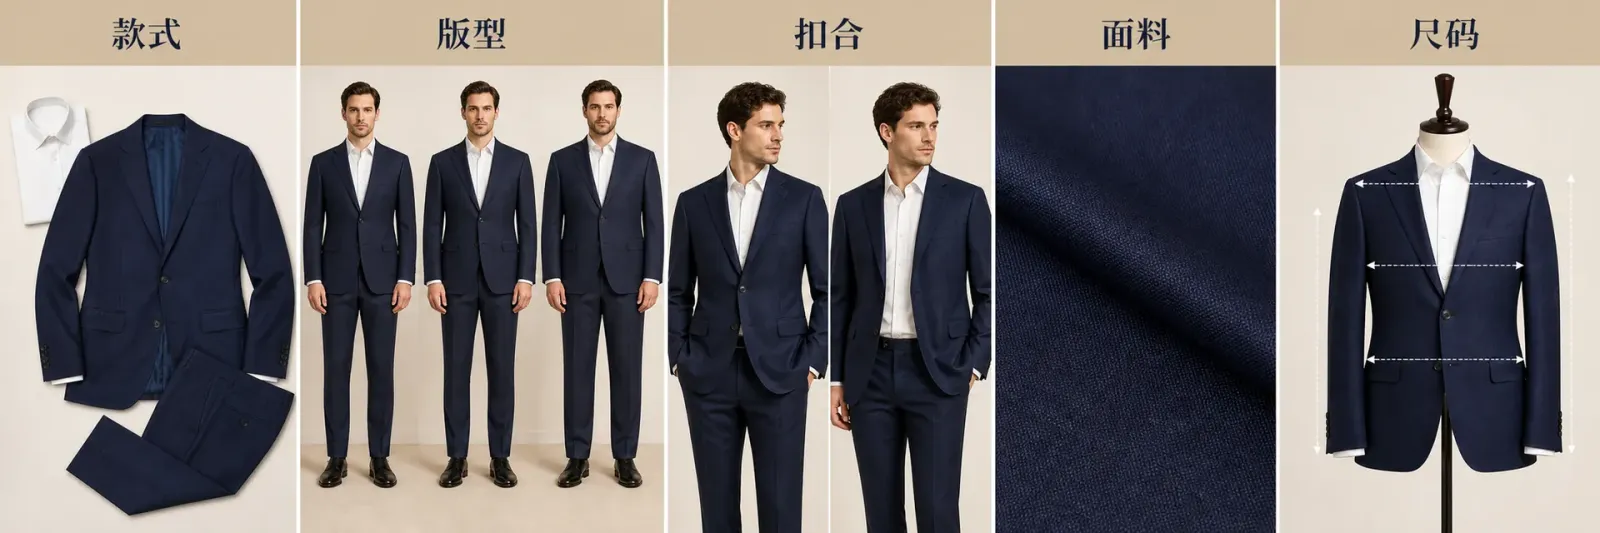
Each image should answer one key question about product selection, enabling buyers to move from “liking” to “choosing correctly.”
I. First, confirm which suit the buyer is choosing
The first set of images clarifies the purchase intent: Is it a single jacket, a jacket paired with trousers, or a three-piece set including a waistcoat? Lapel shape, number of buttons, pockets, vents, cufflinks, and trouser waistbands all define the style. Ties, shirts, shoes, and brooches, if used merely as styling props, should not appear in the flat-lay shots of the full outfit.
When a single product comes in black, navy, or gray variants, each color must have at least one full‑view image. Shopify allows assigning separate images to product variants; according to official guidelines, each variant can have its own dedicated photo, while other angles remain in the main product media gallery. Therefore, for variant previews, choose the image that best confirms both color and style—avoid having a navy option pop up next to a black suit. If these colors have already been approved, you can use the product color‑change feature to generate variant images of the same suit in different hues , then carefully check whether lapels, buttons, linings, and stitching match the corresponding shade.
If supplier-provided materials lack back views or full‑outfit flat lays, you can first supplement the front and back views, along with detailed shots of the suit’s components, using group images of the garment . Enter the current color’s lapel, button count, pockets, vents, and trouser references; after generating the images, cross‑check each element individually—never borrow parts from similar styles.
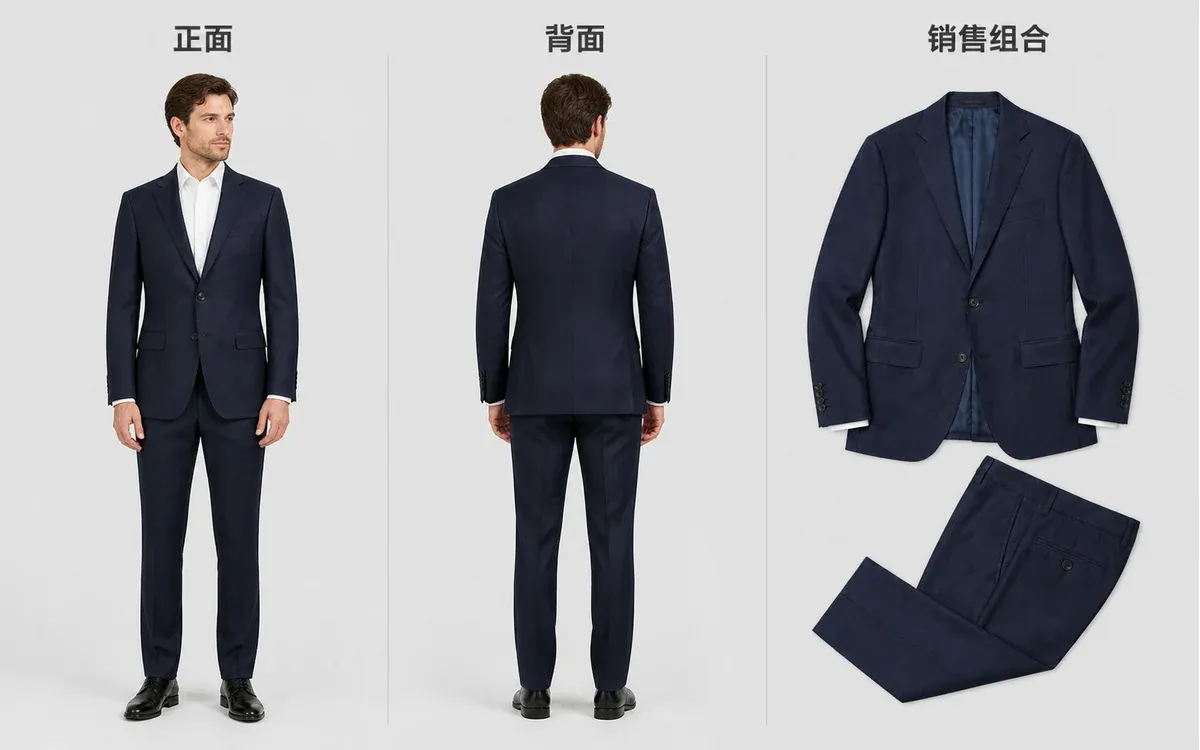
First, clearly identify how many pieces you’re buying, what type of collar and buttons are involved, before moving on to comparing fits.
II. Compare suit fits and buttoned-up states under identical shooting conditions
Comparison criteria | remains unchanged | Focus on observation |
|---|---|---|
Slim-fit vs. regular fit | Same camera angle, similar pose, consistent buttoned-up state | Shoulder line, chest-to-waist allowance, length, and pant leg contours |
Buttoned-up vs. open state | Same style, size, and model | Front placket alignment, waistline, drape, and internal structure |
Sitting posture or raised arm | Buttons, buttonholes, length, and vents | Visible shapes during movement—do not promise comfort based solely on images |
“Slim fit” cannot be judged just by having the model stand straighter. When comparing fits, use the same camera angle, similar poses, and consistent buttoned-up states, so shoulder lines, chest room, waist shaping, and overall length and pant leg contours can be compared side by side. If you simply swap models between two fits, differences in body shape may mask differences in the garments themselves.
First, determine how the brand names its styles and defines their fits, then create image tags. Operators should not arbitrarily label a style as “classic” or “business slim-fit” based solely on visual impressions. If a product lacks fit options, avoid using three-column comparisons to imply that buyers can choose other cuts.
The acceptance criteria for fit diagrams are very specific: check whether shoulder seam placement is consistent, whether the front placket appears excessively stretched when buttoned, whether the side length suddenly increases, and whether the number of back vents has changed. Fits may vary, but the style’s identity must remain unchanged.
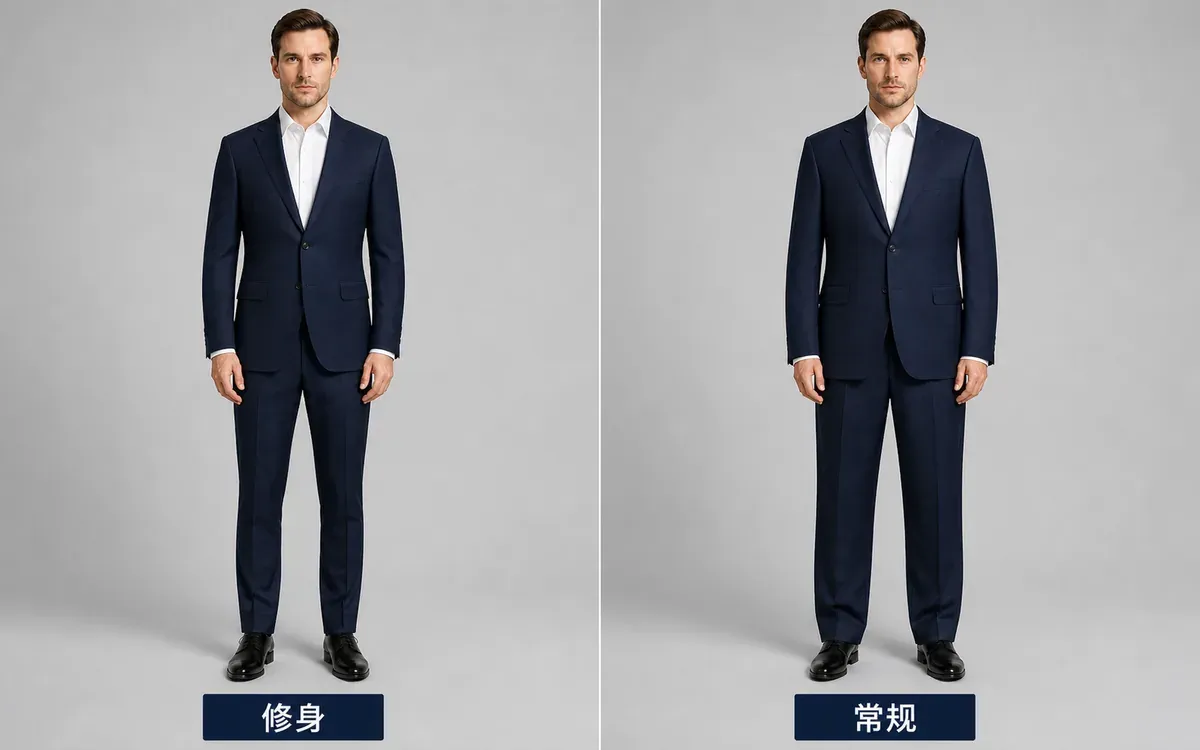
Only create comparison images when a product genuinely offers multiple fits; keep the style, pose, and buttoning state fixed, allowing only cut differences to vary.
1. Buttoning‑state diagrams help buyers assess the front placket, waistline, and ease allowances.
For each suit, at least include both a naturally standing, buttoned front view and an open-front view. The buttoned view shows button positions, placket alignment, waistline, and hem; the open view highlights interior details, drape, and styling options. Seated or raised‑arm poses can supplement activity‑state imagery, but do not let button counts, buttonhole orientations, or garment lengths change with movement.
Single‑breasted two‑button, double‑breasted, and specially designed closures differ significantly and should strictly follow the actual product or the brand’s styling guidelines. Do not treat general dressing conventions as part of the product structure, nor use another style’s fastening method to mask issues with the current size. If obvious front‑placket crossing, collar gaps, or shoulder distortion appear in the images, first determine whether it’s due to improper sizing or a generation error.
When additional poses are needed, you can use model‑wearing photos to generate buttoned, open, and seated views of the same suit . Verify buttons, buttonholes, chest pockets, cuffs, and vents in each image, ensuring no arms obscure critical structural details.
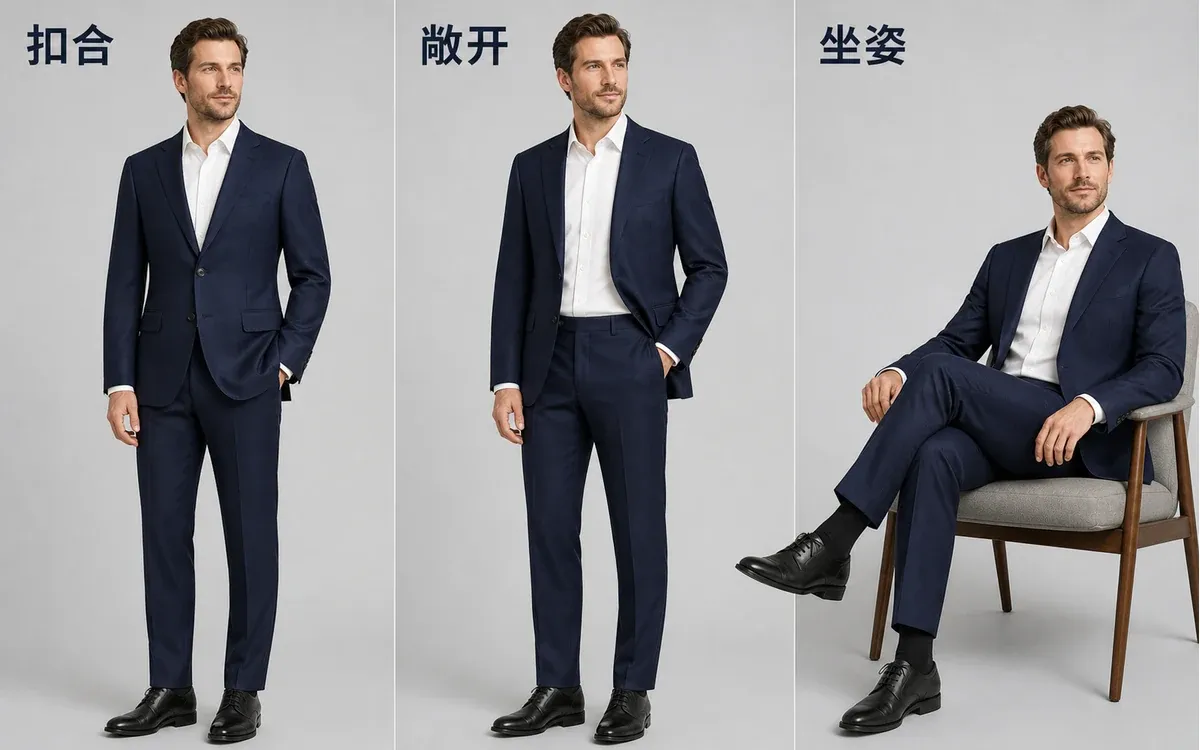
Changes in buttoning states can explain wearing effects, but button and body‑structure details must remain consistent.
III. Fabric images should address texture and surface characteristics, without substituting for material specifications.
Full‑body suit shots often flatten subtle stripes, houndstooth patterns, or fine textures. Close‑up fabric shots should be taken under neutral lighting to capture grain direction, density, surface nap, and sheen, while also including elements like lapels, cuffs, or pockets to help buyers confirm that the close‑up pertains to the current suit.
Dark fabrics especially require careful handling to prevent highlights from turning navy blue into bright blue or dull finishes into mirror‑like surfaces. Maintain one reference color image, using it to calibrate all other scenes. Wool content, blend ratios, weight, wrinkle resistance, or seasonal suitability are product data and cannot be inferred from a single texture image.
If dust, stray threads, or background glare interfere with readability, you can circle lapel edges, seams, and fabric surfaces for localized retouching. Once stripe spacing, houndstooth sizes, or weaving techniques have been altered, the image no longer reflects the current fabric and should be reworked using original source materials.
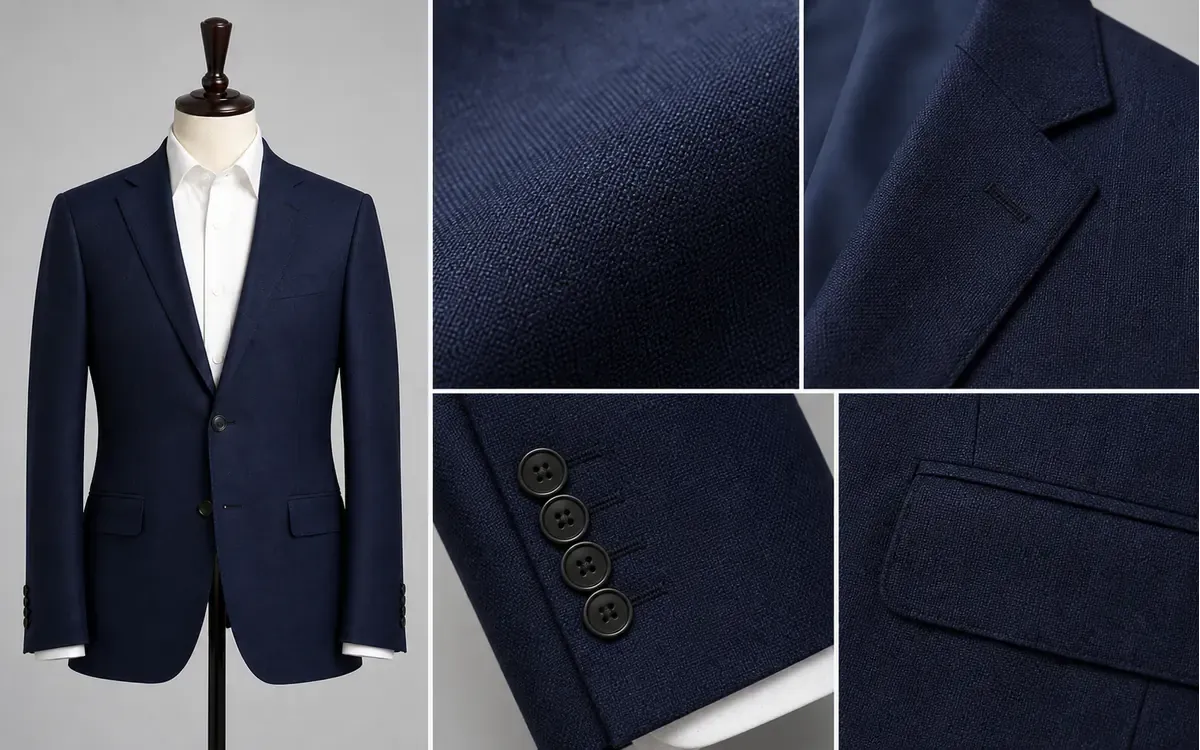
Close‑up texture images provide visible evidence, but composition and performance still rely on officially approved brand documentation.
IV. Size charts and model information work together to guide suit selection.
Ready‑to‑wear size descriptions refer to the garment itself, while human‑body measurements indicate the corresponding body range for that size—never mix these in the same “bust” column. For suits, clearly specify shoulder width, bust, waist, length, and sleeve length; for trousers, note waist, hip, inseam, or overall leg length. Also distinguish between flat‑lay widths and circumference measurements.
Model images should display the brand‑approved height, the size being worn, and key measurements that truly affect judgment. When official data is missing, avoid having AI fill in numbers; you may retain proportion‑based illustrations, but clarify they serve only as visual references. If the jacket and trousers worn by the model are different sizes, list them separately.
Shopify officially recommends using product metafields to store size charts and display relevant information on product pages. During setup, ensure each product uses its own measurement methods and values; short‑sleeved suits, long‑sleeved suits, and different trouser styles should not share a generalized size chart.
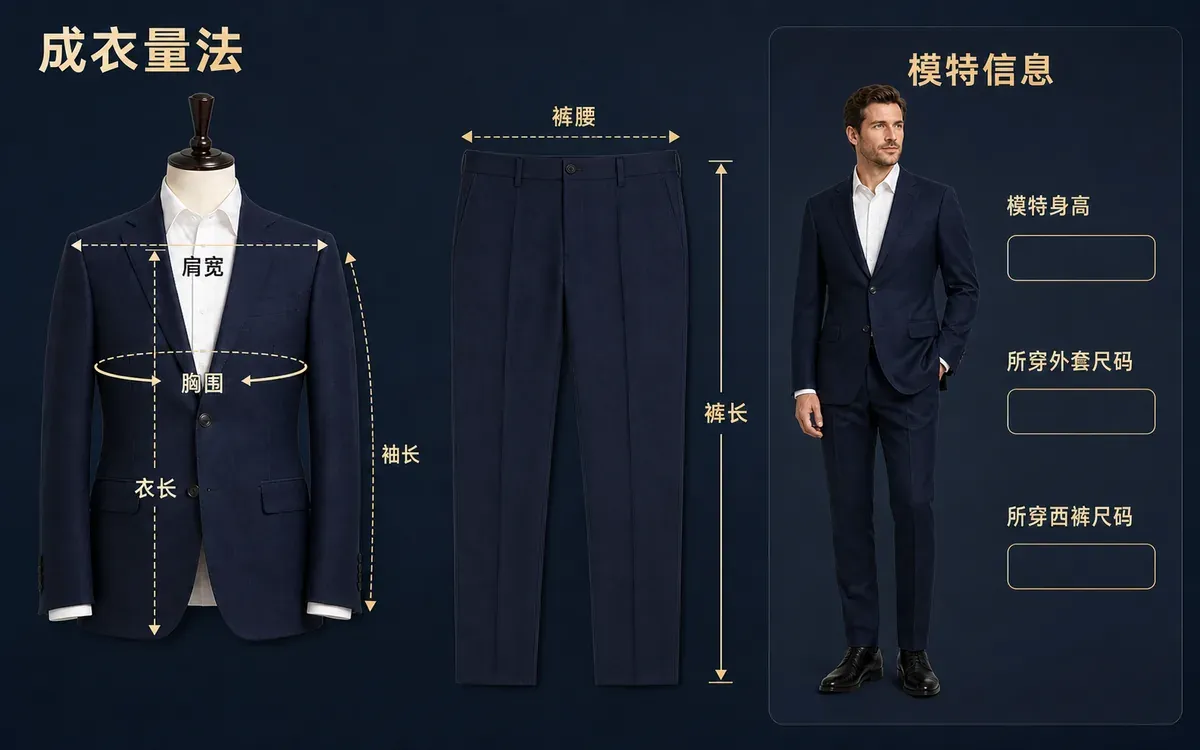
Images should separately show ready‑to‑wear measurements and model information; units, garment data, model height, and the specific sizes worn for jackets and trousers must all align with officially approved brand information.
V. Arrange Shopify suit images into a coherent buyer decision path.
An effective sequence includes: full‑front view of the current color, back view and sales combination, fit comparison, buttoned vs. open front, fabric quality, ready‑to‑wear dimensions and model information, and real‑life scenarios. If there is only one fit, remove comparison images and avoid creating non‑existent options just to meet quantity requirements.
In the Shopify backend, assign the image best representing the current variant to that variant, and arrange other angles of the same color adjacent within the product media gallery. Official guidelines also note that variants can be assigned individual images, while additional related images can still be showcased through the product media library. Before delivery, switch each color and fit option carefully, verifying that preview images, inventory SKUs, size charts, and the media library contain no cross‑mixing errors.
Switching actions | Content that must remain consistent |
|---|---|
Switching colors and fits one by one | Represents images, adjacent media, and inventory SKUs |
Open the size module | Current sizing method, units, garment dimensions, and applicable scope |
View model photos | Model height, key body measurements, jacket sizes, and suit pant sizes |
VI. Common Questions About Men’s Suit Product Images on Shopify
1. When a pinstripe suit is reduced to a small thumbnail in a list, moiré patterns appear—should I replace it with a solid-color image?
There’s no need to change stripes to solid colors. First adjust the shooting distance, image scaling, and sharpening, then check how it appears on both desktop and mobile devices. If the main list thumbnail still fails to display stably, you can choose a full-angle shot with less pattern interference as the preview, while keeping the close-up of the actual stripes on the product page.
2. For suit pants with unhemmed hems, what condition should be shown in the product images?
The reference image should depict the condition the buyer will actually receive, and the product description should clarify whether the hem length needs to be adjusted by the buyer. If you also provide an outfit example after finishing the hem, clearly indicate that the hem has been altered; do not let buyers mistakenly assume the item arrives at the same finished length.
3. Should the temporary stitching used to secure pockets and back vents be removed from the product images?
The reference image should reflect the brand’s specified delivery or display condition. If the stitching is only a temporary fix that the buyer must remove upon receipt, you may add a brief note explaining this; do not simply erase it and leave other angles unchanged, nor should you accidentally delete permanent reinforcement stitches or alter the vent structure.

AI Image Tool Built for E-commerce Teams
For new product launches, advertising, and promotional campaigns, use AI to generate product images, scene visuals, ad creatives, and short video assets — making content production faster.